
We know how critical it is to increase page views and at the same time, we know it is not an easy task.
My page views increased from mere 0 to 70,000 pageviews a month in few months. During the initial months, I spend time on setting up the site and also due to some personal reasons there was no serious blogging involved. So June is when I started posting every week and marketing as well.
Today let me share with you all that I did to increase traffic on Feed Your Temptations.

Food blogs work differently from other blogs. So these tips apply to food blogs only.
Five important aspects of Food Blogging:
1. Photography: Photography is the most important aspect of any food blog. The recipe and the content only come later. Nobody is going to go through your recipes initially. The photo is something which will draw others to your blog and will keep them on your blog. If you can improve your photography skills then the most difficult aspect is taken care of. I like to take closeup pictures of food, especially cakes and bread because the texture is so important when it comes to baked goods. I personally only try recipes I see a detailed picture of, because when it comes to food, photos lure you in.
2. Recipe: I am not saying a recipe is not important. Its the 2nd most important thing because other people will be investing their time and ingredients to make something you post. You have to respect that and so double check your recipes before hitting the publish button. Negative reviews are not what you are looking for. Most of the time people don’t leave a negative comment but they might not try your recipe again. To generate trust so that you can build a long-term relationship with your readers, you need returning visitors who can spread the word around.
3. Content: Unfortunately its the 3rd. If you have great content without a good photo, readers might seldom stay for long. They are here for recipes. Having said that, I like to see a post with content rather than just recipe. I like to read their stories, but at the same time when its too long, I simply skim through it. A good story definitely creates a connection. Pay attention to sentence construction, spelling and read it out loud a couple of times before pressing publish. You will be amazed by how many mistakes you will catch in the process. I am not saying I am perfect. When I look at some of my older posts I absolutely hate it. I have rewritten a few of the posts with new content, photography, and recipe. I have improved quite a bit and still, there is a long long way to go. Will Write for Food:( The Complete Guide to Writing Cookbooks, Blogs, Reviews, Memoir, and More) is a great book if you want to improve your writing skills.
4. Marketing: Posting great recipe and content is not enough. You have to open it to the world through social media sites.
5. Website Design: A clean accessible website design makes a huge difference.
Lets elaborate on each now:
Food photography: This is the key.
Pinterest, Facebook, Google+ and other social media sites play a major role in bringing traffic and people click on the link only if the photos look good.
I got a DSLR when I was sure that I wanted to start a food blog. Yeah…before I even published my 1st post…You can call me crazy.
I tried to explore the world of DSLR by searching the internet and reading about photography posts written by different bloggers. I did get tidbits of information but nothing was complete and the technical jargons went above my head. That’s when I started looking for a food photography book and ended up with Tasty Food Photography book from Lindsay of pinch of yum, a popular food blog. It has been the best resource purchased so far.
If you are still struggling to understand the basic setting of a DSLR (White balance, shutter speed, depth of field and ISO) then this book is for you. Its so well written, to the point and is easy to understand. After reading this book my food photography improved and almost all my food photos were being accepted by photo sharing websites like Foodgawker and Tastespotting.
In this book, Lindsay also explains how to take pictures with a point and shoot camera and cellphones.


(Its hard to believe that the above two pictures uses the same spicy guacamole recipe and was shot with the same camera.)
Another book I like is Plate to Pixel: Digital Food Photography & Styling This book is more like a theory. To be honest I liked this book because my concepts were clear by the Food photography ebook, or else this book could have been a bit overwhelming. If you are further looking to deepen your knowledge then I suggest reading Plate to Pixel. I like this book for props, styling tips, tricks used by professional photographers, styling hot food, cold food, meat etc. After reading this book, food styling has become a lot easier.
Camera: I use a Canon EOS Rebel T3i and EF 50mm f/1.8
for my food photography. This lens is ideal for taking food pics and is the cheapest of all, about $100. If you already have an SLR then getting this lens is a good idea. If you want to go higher then EF 50mm f/1.4
is about $350.
If you like to collect book and want to stay in budget get used books in good condition.
Recipe: How to write a good Recipe:
Ingredients: Write in the order in which it will be used. Divide it into subheadings so that its easier to use the ingredients.
Provide both measurements in gms and pounds. Every country follows different measuring guidelines. I like to follow measurements in cups and when I see an irresistible recipe in gms, I simply don’t go through the trouble of converting it even if I absolutely want to. I look for similar recipes. Provide both measurements and your audience base will increase. Save a note with basic conversions of temperatures and commonly used ingredients on your notepad, e.g.

It’s not that difficult as you think. I have a set of measurements on my notepad with basic conversions, so all I do is add it to the ingredients when posting. It takes only about a minute or 2. Always recheck the conversions when calculating.
Provide easy steps: Often people tell me my recipe instructions are easy to follow. I try to jot down recipes in terms of efficiency. For e.g., With Tiramisu, you have to make coffee and cool it before beating the cream. This helps readers to save a few minutes and also lessens the pain to go back and forth a recipe.
Provide substitutions and alternatives: I remember when I had just started baking I would look at a recipe which I absolutely wanted to make and then I see one ingredient missing. I would go to the store to get that ingredient or just keep it for some other time. Once I remember rushing to the store to get buttermilk for a cake early in the morning. The worst part is you get specialty ingredients and you have to find another use for it. Now I always use buttermilk substitution, (milk + vinegar).
I also like to provide substitutions for ingredients, like sour cream, which is not readily available in some countries.
Select the Recipes: If you are just blogging for a hobby, post whatever you are making and that’s ok, but then you wouldn’t be reading this. Know your target audience and understand readers needs. It takes planning, time and effort to post a single recipe. So let’s make it worthwhile and let’s not waste our time on things readers are not keen on. That being said, you can also maintain a balance between what your readers will like and what you like to post.
What to post: I like to avoid boundaries. For instance, chicken tikka masala, tiramisu or black forest cake is something which readers everywhere would like to try.
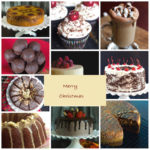
When to post: Christmas and special occasions. Posting a plum cake(with alcohol), rum cake or rum truffles during Christmas, tiramisu or chocolate pudding for valentines day will drive crazy traffic to your blog. Post it on social media sites and look at the boost. Give readers what they are looking for.
Content: Try to improve your SEO (Search Engine Optimization) by using the correct keywords. Read your content loud and look for lousy sentence construction and spelling mistakes. This is an area I am still getting hold of. SEO will need an entire post to itself. Food blogger pro provides a great resource for SEO and other blogging tips. Food Bloggers Central by Nagi of RecipeTin Eats is a great place for blogging resources.
I recently found GRAMMARLY and it has made my life so much easier. It eliminates grammatical errors and improves your writing. There is both free and premium version available. I use the paid version which has a lot more features.
Marketing:
Try to update your social media page regularly, if not daily.
These are the ones I use:
Yummly: You can place a yum button on your image. Yummly is a great way to get your recipes out there to a broader audience. With a single click, through a bookmark, you can post your recipes to their site. Only the recipe, image, and ingredients will be shown on yummy and its linked back to your site. Become a publisher on yummy and get featured on their social media sites. This could become your number one traffic source. (I have only recently started posting to yummy but have heard good reviews on the blogosphere).
Facebook page: It is a great way to reach out to your fans. Join Facebook food related communities and share recipes, useful tips, and information.
Pinterest: Place a pin button on your image. It makes it easier for people to pin your image.
Google+: Surprisingly I don’t see people mentioning Google+ on sharing sites. I like the food communities on Google+ which had 100K + members. You can post in the communities and get a good exposure. There are many such communities and I also read recently that being popular on Google+ is good for google ranking (personally I don’t know how it has affected my rankings).
Foodgawker and Tastespotting: These are few of the best photo sharing websites but its a challenge to get your pictures accepted. It drives good traffic to your site but it can be frustrating when your pictures don’t get accepted. I like to have a critique of my food pics and I see Foodgawker and tastespotting doing that for me. It definitely helps you improve. I had friends and family telling me my food pics are awesome even during the initial day. I love you guys, but I knew my pictures were horrible and were not even close to the good pics.
There is additional traffic generating photo sharing sites, I found a top photo sharing sites for food blogs written by Chris of shared appetite. I loved his tip where he says, When ready to submit to food photo sharing sites, open them all up in different tabs within the same window and then copy and paste each line of information in each tab.
Due to lack of time, I only submit to food gawker and sometimes tastespotting, but I am going to try the above tip and see how that goes.
Twitter: This is another good way to get your word out there.
Email: Have people subscribe to your emails. Rss is old. Try setting up something more appealing with Mail chimp.I like this mail chimp setup tutorial from stuffedweb.com
Spend at least an hour on social media sites every day. But limit your social media usage and don’t let the social media pull you into a rabbit hole. I spend close to an hour in the evening on social media only when my actual productive work is done.
How Often to Post:
Initially, I posted 3 recipes a week but when I had 100 recipes on the site, I cut down to two. I started focusing more on quality and marketing. But try to post at least once a week.
It is important that you find time to spread your word across or else just creating recipes without an audience will be effortless.
Designing Website:
Giving your website a clean, easy to access design makes a lot of difference. I got my site redesigned in November 2014 and the traffic increased tremendously.
There are companies which charge thousands of dollars for designing your blog and I understand if you are a new blogger and are not earning income from your blog then paying so much doesn’t make sense.
I hired Sam from webcreatesolutions through ODesk. For few $100 he helped me design my site using Daily Dish Pro Theme theme on genesis framework. ODesk is a great website for hiring people based on what your budget is. I even got my site logo and business card designed through ODesk.
Try not to be a DIY blogger:
For a year and a half, I took care of everything on my own, the back end and front end stuff, and it consumed a lot of my time and my blogging suffered. So hiring someone definitely helps. I now hire sam on an hourly basis whenever I don’t want to spend time on the technical aspect.
Don’t forget to subscribe to email so that you don’t miss any future updates and resources.
Follow me on Instagram to get behind the scene photography setup and day to day updates. (I started using Instagram only recently)
Lastly, Check out this article on how to Stop tracking your own page views if you haven’t done it already.
Happy Blogging!
Teena








 HEY THERE! HAPPY TO SEE YOU 🙂