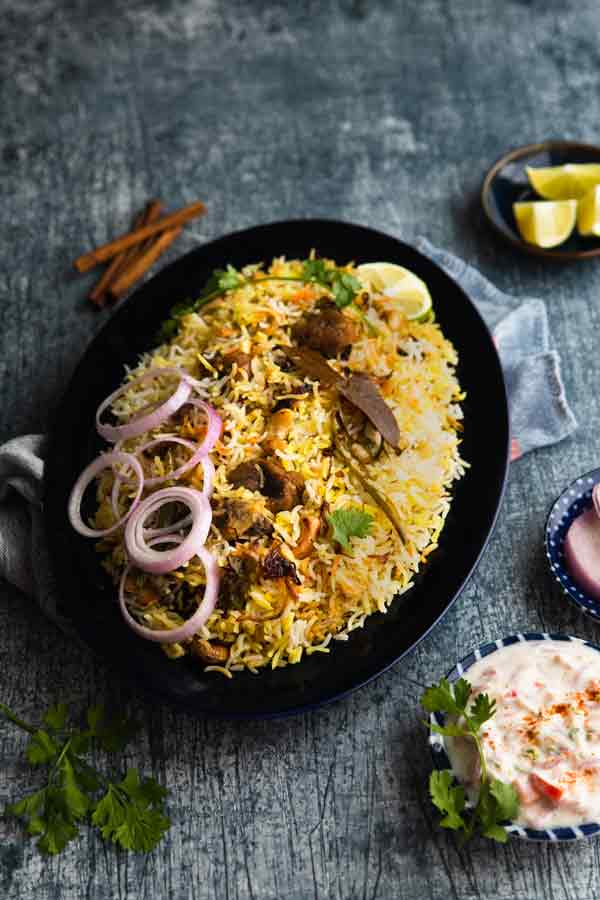
Mutton Biryani Recipe – The Hyderabadi dum biryani recipe is made by layering and cooking meat and rice with lots of flavors. It’s simple and I have broken down into steps that will help you to make it without the overwhelming feeling. Making Mutton Biryani wouldn’t get any easier!!!
Check out this weeks blogging tip above the recipe.
Everyone has a unique way of making Biryani. There is no right or wrong recipe but the most important part is the way you flavor the meat and rice.
You will need two pots to make it. One to marinate and cook the meat and the other one to cook the rice.
Over the years, I have spent countless hours trying to perfect a good biryani recipe. I have researched, taken tips from people who make good biryani, and finally, I have a foolproof recipe. Now I use this same style to make vegetable dum biryani and chicken biryani.
What is Dum Biryani?
Dum biryani is a way of cooking meat or vegetable and rice with the trapped steam. Once you add the ingredients, the lid is covered and sealed with dough and it is slowly cooked with the trapped steam.
Some people cook biryani in a pressure cooker. I do not prefer that method because sometimes the meat and rice tend to overcook.
My mom cooks meat and rice separately and then layers them together and heats it up on the stovetop or in the oven. She also likes to grind the herbs and add them while cooking the meat. My sis on the other adds roasted ground khus khus or poppy seeds.
Once you try this recipe you can add more flavors you like or come across.
Mutton biryani near me
In Dubai, I love the mutton biryani you get in Gazebo and Kulcha King. There are definitely more places, but these are the restaurants we visit frequently when we are in a mood for good Biryani.
Mutton biryani ingredients
You will need:
- Mutton (Substitute chicken if you wish) Mutton takes longer to cook and needs more marination time
- A good quality basmati rice (You don’t have to use a premium quality every time. For everyday use, you can use cheaper long grain basmati rice)
- Everyday spices (whole and ground) plus oil and ghee
- Milk and Yogurt
- Cashews
- Food color (Optional)
How to make mutton dum biryani at home?
A little bit of planning and following a pattern saves a lot of time and effort when making biryani.
Flavoring the meat and rice nicely is the key.
- Marinate the mutton with all the spices at least 8 hours to 12 hours in advance. If you are in a hurry you can also marinate for 1 hour but the longer your marinate, the flavor gets it and the meat becomes tender. (If you are making biryani for dinner, marinate in the morning and if you are making for the afternoon, marinate the previous night and place in the refrigerator.)
- Fried Onions makes the biryani moist. You can either use store-bought or homemade.
- Rinse and soak the rice for about an hour in cold water. This separates the rice and makes it fluffier.
- Gather the ingredients (Start doing this when the rice is soaking)
- Start making Biryani: When the rice and meat are cooking, chop the herbs.
Mutton Biryani: a step-by-step method with images
1st Step: Fry the cashews and onions. Drain and keep aside
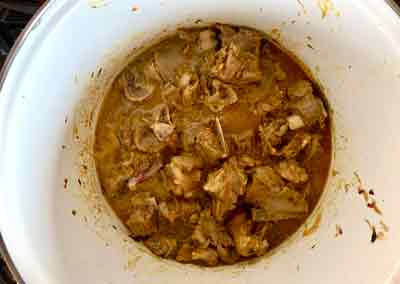
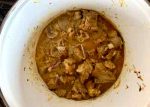
2nd Step: Add marinated meat let it cook to almost 75% done.
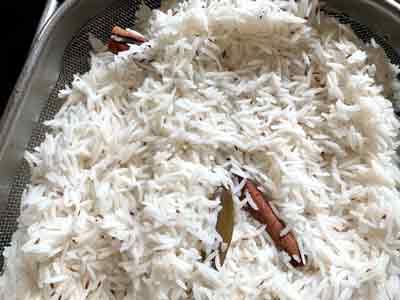
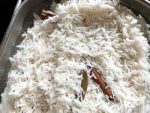
3rd Step: Bring a big pot of water to a boil, season with salt and spices, and cook the rice to 50% doneness. Taste and adjust the flavor of the water as needed. Salt should be slightly more than what you normally have. Drain and keep aside.
4th step: Cook the mutton till you see an oil layer on top.
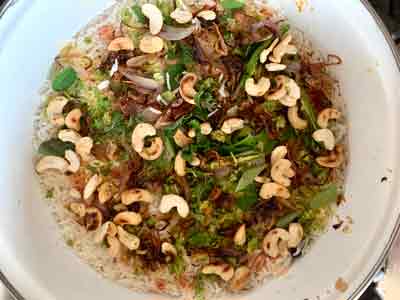
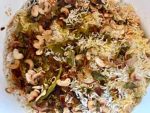
5th Step: Add 1/2 of the cooked rice and half of the fried onions + coriander leaves + mint leaves. Add the remaining rice and fried onions + coriander leaves + mint leaves + 2 green chilly. sprinkle reserved rice water on top followed by saffron milk. Sprinkle a few drops of food color if using.
Add a tablespoon of ghee and fried cashews.
6th Step: There are three ways you can cover. 1. With an aluminum foil: Place an aluminum foil on top and slightly seal and place a lid on top. 2. Seal with any kind of dough available. 3. Place the lid and keep something heavy on the top so that the steam does not escape.
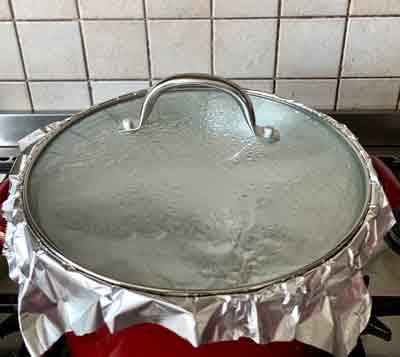
7th Step: Place a girdle or pan on the stove and transfer the biryani pot on top. Reduce the heat to minimum and let it cook for 40 to 50 minutes.

Step 8: To check for doneness, open the lid and slide a laddle along the side of the pan and scoop out the meat. If there is no water content and the mutton is tender, it means the biriyani is ready.
P.S: THIS WEEKS BLOGGING TIPS
Videos are informative and create engagement but it is time-consuming. Another great way to make an interactive slide show is by using apps. I created a couple of slide shows by using the FREE jumprope app. It is super easy and you can create amazing content for Instagram and other social media.
The only thing is you can to use it on a phone. The computer version might launch soon. The best thing is you can convert the same slideshow into different formats.
Here is a link to one of the slideshows I created using this app.

Mutton Biryani Recipe - The Hyderabadi dum biryani recipe is made by layering and cooking meat and rice with lots of flavors. It's simple and I have broken down into steps that will help you to make it without the overwhelming feeling. Making Mutton Biryani wouldn't get any easier!!!
- 1/2 kg or (1 pound) Mutton/Goat (Medium-cut)
- 2 cups Basmati rice
- 1/2 cup cashews
- 2 medium-size onions (yields 2 cups), finely sliced (You can also use store brought (1 and 1/2 cup))
- 1/8 cup oil
- 2 tablespoons ghee
- 3/4 cup thick yogurt or greek yogurt Please refer notes
- 1 tablespoon red chilly powder Use Kashmiri chilly powder/paprika for less heat
- 1 tablespoon biriyani masala or garam masala
- 1 teaspoon chaat masala
- 1/2 teaspoon turmeric powder
- 1/2 teaspoon nutmeg powder
- 2 tablespoon lemon juice
- 1 teaspoon tamarind paste
- 1 and 1/2 teaspoon salt
- 2 green chilies slit
- 1/8 cup ginger garlic paste
- 1/4 cup roughly chopped coriander/cilantro leaves
- 1/4 cup roughly chopped mint leaves
- 1 teaspoon raw papaya paste or 1/2 teaspoon meat tenderizer optional, but ideal
- 1 cup fried onions from above
- 2 tablespoons ghee
- 1 tablespoon oil
- 6 cups water
- 3 teaspoons Salt or to taste
- 1 tablespoon lemon juice
- 2 teaspoons shahi jeera
- 1/2 teaspoon garam masala
- 1/2 teaspoon ghee
- 2 star anise
- 2 cardamoms
- 2 bay leaf
- 1 cinnamon stick
- 1/2 cup drained rice water from above
- 1 tablespoon ghee
- pinch of saffron crushed and soaked in 1/8 cup milk
- 2 green chilies
- 1/2 cup roughly chopped coriander/cilantro leaves
- 1/4 cup roughly chopped mint leaves
- fried onions from above
- fried cashews from above
-
Wash and drain the mutton well. Transfer into a mixing bowl.
-
Add yogurt to another bowl and add the ingredients listed under the mutton marinade. Mix well and add it to the mutton and mix well again. Add coriander leaves + mint. Add fried onions if using storebought or add it later when you are about to cook the meat. Cover and keep this aside from 1 hour to 12 hours. (If longer than an hour, place in the refrigerator)
-
Pro Tip: If you are in a hurry, you can also marinate for 1 hour, but the longer your marinate, the flavor gets it, and the meat becomes tender. (If you are making biryani for dinner, marinate in the morning, and if you are preparing for the afternoon, marinate the previous night.)
-
Wash and soak the rice for 30 minutes to an hour.
-
Meanwhile, gather the ingredients needed for assembly and for cooking rice in separate plates for ease.
-
Place a dutch oven or a large non-stick pot big enough to hold the mutton and rice on medium-high heat. Add 1/8 cup oil + 2 tablespoons ghee in a pan.
-
Fry the cashews till golden brown and keep aside. After that, add the onions to the same pan and fry on medium heat till golden brown and crisp. Drain and keep aside and reserve the oil to make biryani.
-
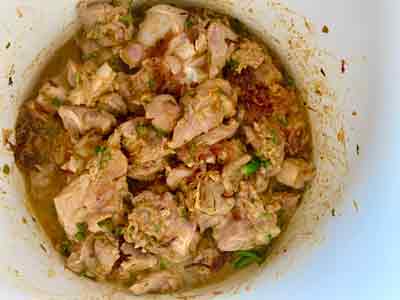
Add the marinated meat. (add 3/4 cup fried onions if you did not add during the marination process) Stir and let it cook till 75 % done and till oil is seen on top. Taste and adjust the salt if necessary.
-
While the meat is cooking, bring 6 cups of water to a boil. Add salt as needed (When you taste the water the salt should be slightly more than what you usually need).
-
Add all the ingredients mentioned in TO COOK RICE to the water, and then add the soaked and drained rice and let the water come to a boil. Taste and adjust the flavor of the water as needed. Salt should be slightly more than what you normally have.
-
Reduce the heat and stir the rice and cook it only till only half-cooked (When you take a bite you will feel it will be underdone in the center. It is a crucial step or else the rice will be mushy.
-
Drain the rice in a colander and reserve 1/2 cup of water.
-
To the partially cooked mutton, add 1/2 of the cooked rice and half of the fried onions + coriander leaves + mint leaves. Add the remaining rice and fried onions + coriander leaves + mint leaves + 2 green chilly. sprinkle reserved rice water on top followed by saffron milk. Sprinkle a few drops of food color if using.
Add a tablespoon of ghee and fried cashews.

-
There are three ways you can cover. 1. With an aluminum foil: Place an aluminum foil on top and slightly seal and place a lid on top. 2. Seal with any kind of dough available. 3. Place the lid and keep something heavy on the top so that the steam does not escape.

-
Place a girdle or pan on the stove and transfer the biryani pot on top. Reduce the heat to minimum and let it cook for 40 to 50 minutes.
-
To check for doneness, open the lid and slide a laddle along the side of the pan and scoop out the meat. If there is no water content and the mutton is tender, it means the biriyani is ready.
-
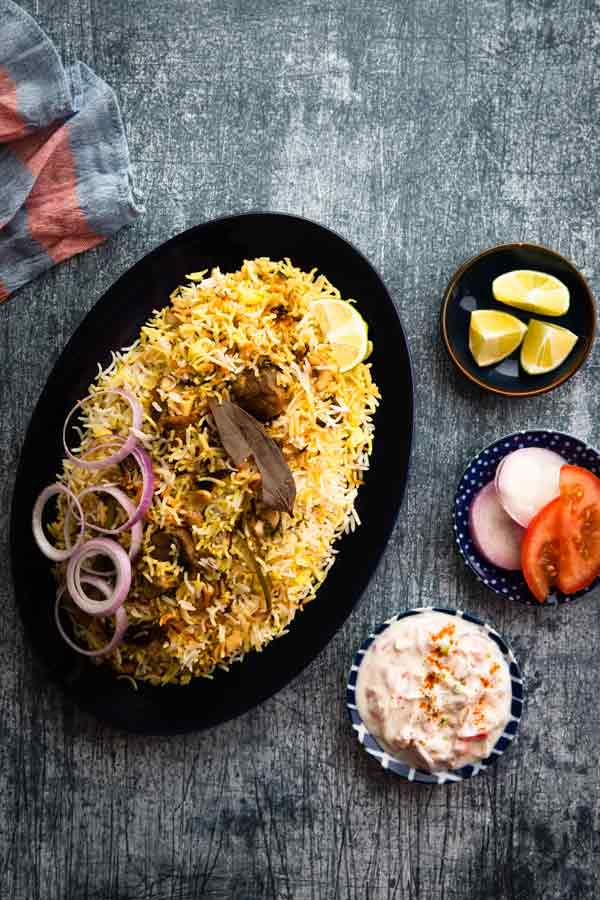
Serve with raita/salad, papad, and pickle.
To make the process easier I have divided into steps:
- Marinate the meat in advance.
- Gather the ingredients list under individual groups in separate plates or bowls before you start cooking.
- Read the recipe 2 to 3 times to understand the process.
For Thick Yogurt: Lay a kitchen paper towel or muslin cloth in a big strainer. Add 1 cup of yogurt and let it sit for 15 to 20 minutes.


 HEY THERE! HAPPY TO SEE YOU 🙂
Loved it!
Thank you Surekha 🙂 Glad to hear you liked it!
Great Recipe!
Thank you so much for your feedback Avinash 🙂
Hey, I thought your page was good!
Thank you 🙂