This pav recipe makes pull-apart rolls that are soft and slightly chewy, exactly like the way a ladi pav is supposed to be. You will not miss the classic/traditional pav anymore. Sesame seeds are optional.

Indian street food, which is popularly known as chaat, has a special place in everyone’s heart who grew up in India. It is the perfect combination of sourness, spice, and sweetness that gives a tickling sensation to your taste buds and makes it addicting and totally worthwhile. Topping of raw onions, herbs, and spices makes it healthier compared to the other sugary and processed fast foods.
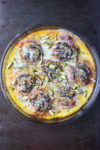
Street style Pavs are slightly chewy and soft, but not buttery like the classic dinner rolls. So, every dinner roll cannot be pav. The Mumbai-style ladi pavs can be had with any savory or spicy curries. They are perfect for pav bhaji, misal pav, egg bhurji or simply with some jam and butter.
The pav recipe makes 15 medium-sized rolls. When it comes fresh out of the oven there won’t be an option of leftover. It just disappears 🙂
If you like the soft and buttery rolls the try these garlic dinner rolls.

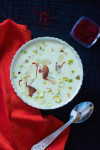
If the thought of street food is making your mouth water, then this crispy aloo tikkis/potato tikkis and almond and pistachio kulfi/Popsicle are something worth trying.
How to make ladi pav at home
There are a couple of things to keep in mind while making this bread. It’s always better to have a slightly sticky dough than a dry one.
Brushing milk before you put the pavs into the oven gives this pav a beautiful color. Eggwhites beaten with a tablespoon of water and pinch of salt gives it a darker color.
Brushing melted butter on the pavs immediately after removing it from the oven gives it a shiny look and makes the golden brown color darker.

Pav recipe step-by-step
Check out the step by step instruction to make the classic Mumbai street style Pav.
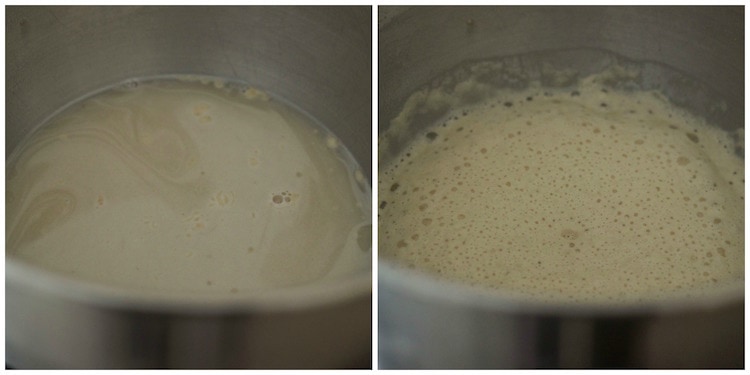
- Mix Warm water + yeast + sugar + 1 tablespoon flour in a mixing bowl and keep it aside for 10 minutes or till the mixture foams.
- Once the mixture foams, add salt +melted butter + oil and stir it.
- Add 4 cups of all-purpose flour and knead well. The mixture will be sticky, but keep working on it till the dough comes together.
- Transfer onto a floured work surface and knead well with the palm of your hands for 4-6 minutes for the gluten to develop. You can add the remaining 1/2 cup of flour, one tablespoon at a time, as needed.
- (Depending upon where you are staying and the type of flour you are using, you may need a couple of tablespoons more or less flour. The key is to have a slightly sticky dough once you finish kneading well.)
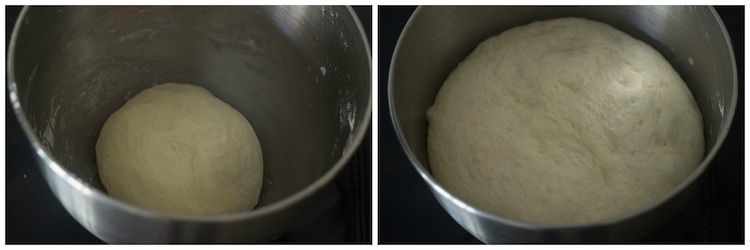
- Lightly oil the bowl and transfer the dough. Coat the dough with oil.
- Cover the bowl with a damp kitchen towel and let it rise for about 1 and 1/2 hour to 2 hours or till its double in size.

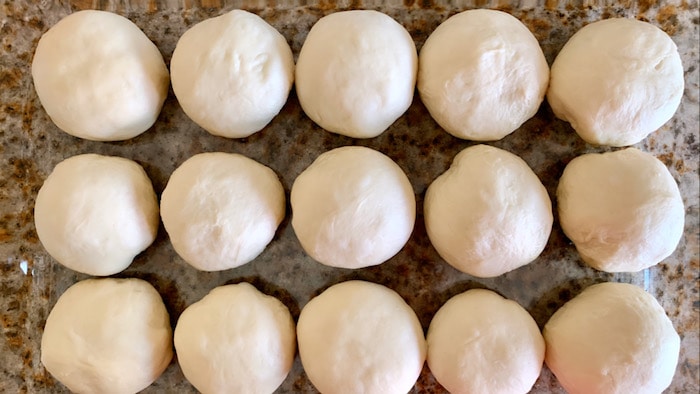
- Punch down the dough and transfer onto a floured work surface. Flatten it with your hands or rolling pin and divide the dough into 15 portions.
- Take each portion and pinch down the sides into the center.
- Prepare a 9*13 inch baking pan by brushing with oil and sprinkling with flour.
- Arrange the seam-side down on the baking pan close to each other.

- Cover with a damp cloth and let it double in size, which should take almost 40 minutes.

- Brush the top and sides of the buns/pavs with milk or eggwhite. Sprinkle sesame seeds if you wish.
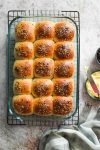
- Bake for 20 minutes or till the top is light golden brown.
- Once the pavs are out of the oven, brush some melted butter. That will give a shine and make the golden brown color darker.
- 1 and 1/2 cup warm water 50 seconds in the microwave
- 2 teaspoons active dry yeast
- 2 tablespoons sugar
- 1 and 1/2 teaspoon salt
- 1 tablespoon butter melted
- 3 tablespoons oil
- 4 to 4 and 1/2 cups All-purpose flour/maida
- Milk for brushing (or eggwhite + 1 tablespoon water + pinch of salt beaten)
- Melted butter for brushing
-
Mix Warm water + yeast + sugar + 1 tablespoon flour in a mixing bowl and keep it aside for 10 minutes or till the mixture froths.
-
Once the mixture froths, add salt + melted butter + oil and stir.
-
Add 4 cups of all-purpose flour and knead well. The mixture will be sticky, but keep working on it till the dough comes together.
-
Transfer onto a floured work surface and knead well with the palm of your hands for 4-6 minutes for the gluten to develop. You can add the remaining 1/2 cup of flour, one tablespoon at a time as needed.
-
(Depending upon where you are staying and the type of flour you are using, you may need a couple of tablespoons more or less flour. The key is to have a slightly sticky dough once you finish kneading well.)
-
Lightly oil the bowl and transfer the dough into the bowl. Coat the dough with oil. Cover the bowl with a damp kitchen towel and let it rise for about 1 and 1/2 hour to 2 hours or till its double in size.
-
Prepare a 9*13 inch baking pan by brushing with oil and sprinkling with flour.
-
Punch down the dough and transfer onto a floured work surface. Flatten it with your hands or rolling pin and divide the dough into 15 portions.
-
Take each portion and pinch down the sides into the center. Arrange the seam-side down on the baking pan close to each other.
-
Cover with a damp cloth and let it double in size, which should take almost 40 minutes.
-
Preheat the oven to 200 Degrees Celsius/400 Degrees Fahrenheit.
-
Brush the top and sides of the buns/pavs with milk. Bake for 20 minutes or till the top is light golden brown.
-
(When you press the sides of the buns, it should spring back. This is how you ensure that the bread is cooked.)
-
Once the pavs are out of the oven, brush some melted butter. This will give a shine and make the golden brown color darker.


 HEY THERE! HAPPY TO SEE YOU 🙂
[…] Soft buttery rolls | pavs […]